Tuesday, July 1, 2014

Transitioning to Cindy Ho Designs

Banner copy

For the last 4 years, I’ve been in complete denial.  Refused to face the reality that I have to move on from West Coast Origami.  For those who’ve been following, you may already know that I’ve had to expand my business as my passions has migrated to graphic design and I need to include that as part of my small business.  As with any growth, my name needed to also reflect my changing passions.  Now that I’m trying to reactivate my blog, I realize that I can no longer maintain two. 

I’m not going away!  If you are still interested in following my thoughts and ramblings, please become a reader of

cindyhodesigns.blogspot.ca

This West Coast Origami blog will no longer be maintained, but will keep it open as many are still finding this blog and reading the posts.

Monday, December 2, 2013

Love Getting Handmade Cards!

8b5799384e4111e2890a22000a1fbc9a_7I have a pretty bad habit of not opening up my Christmas cards attached to gifts until Christmas day.  I received two beautiful handmade cards last year and it was much too late for me to rave about them. 

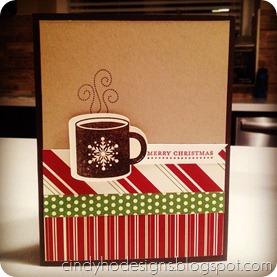
This is the 2012 hot cocoa card made by our dear friend Twyla.  Check out the one she made for us in 2011.

54ee82ea4eef11e2a56722000a1f9d88_7The second card we received was this snowflake diecut card from my sister in law from Lucky Charms Card Collection.  This is one of the simpler cards she’s made.  I like minimalist designs so this one is my favourite so far. 

Looking at last year’s card, makes me look forward to what we’ll get this year!

Wednesday, February 6, 2013

Saturday, December 15, 2012

More Christmas Cards from Aunty Toy

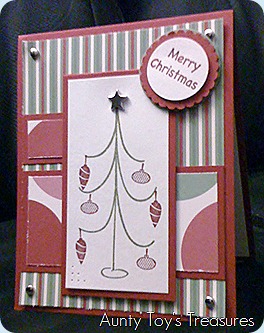
IMG_8175Every year Twyla makes this wonderful Christmas cards for our family.  She improves her skill and technique every year.  These are two she made for my family and my in-laws last year.  Yes, I should have posted around the holidays last year, but we were so busy preparing our move so we can build my new studio…err…I meant home.

IMG_8173She always say she doesn't’ want to make a business from her card making, but I really think she should. I’m sure people would invest in her cards.

What do you think?

Sunday, November 25, 2012

The Return of West Coast Origami

Back in November 2011, I had to put my Etsy and Cargoh store on hiatus for a year.  It was a tough year as not only the store was put on hold, but also our lives as we were building our new work space. 

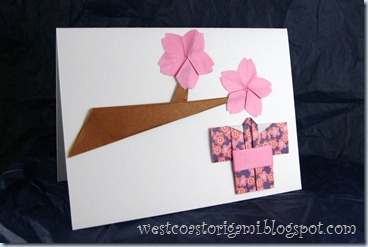
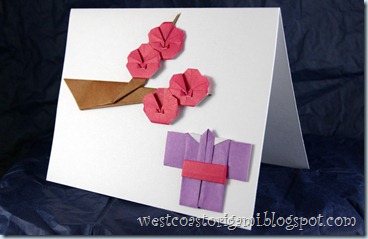
Now I’m easing back into handmade cards and loving every minute of it.  My favourite ones are back, my origami flower and Kimono cards.  I will be slowly building up more inventory in the next few days and will post updates on my Facebook Fanpage or Twitter

cherry blossom, kimono card- traditional (3)

plum tree card - Fumiaki Shingu (3)

Tuesday, August 28, 2012

Origami Heart Box

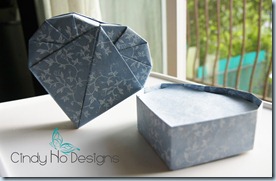
Recently, I was asked to fold a jewellery box.  However, a plan square box wouldn’t do.  It wasn’t long to find the perfect design!  This is the Heart Box designed by Robin Glynn. 

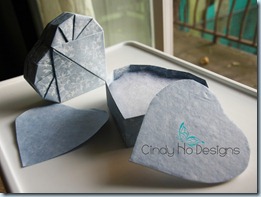
IMG_8042 copyThis box is folded by one standard North American letter sized paper (8.5 x 11 inches).   The lid and base are made from making only one lengthwise cut. 

The magnitude of this fact is important.  Most of us have readily available in offices, school and at home.   Sometimes handmade or high end quality paper and sampling is often cut to 8.5 by 11. 

If you are looking for high quality handmade paper with beautiful designs, try The Paper Place, most of their paper designs will offer this size.

The original instructions was based on A4 sized paper (210mm x 297mm).  You can do a web search for more examples, but these are the ones I found for my project

The final size of this box ends up to be 3 inches lengthwise on the lid and 3 inches @ the widest part.  Perfect to gift a ring or earrings.

IMG_8047 copyThis heart box had to house a necklace so needed a sheet twice as large and I needed it in a hurry.  Lucky for me, there was Deserres!  They carry large format sheets that I cut to size.  As you see here, I put in adders so the necklace would be displayed nicely. 

This was the first origami project I invested time in since temporarily closing shop.  It was very enjoyable folding experience, and it’s a useful item to make!

Sunday, April 22, 2012

Product Review: Photobook Creater by Unibind

This past weekend, I went to a event hosted by the Scrapbook Warehouse.  It was the Photobook Creater Make-N-Take in store demo.  There was a new letter announcement and my sister-in-law really wanted to go.  So said, sure!  I haven’t been doing anything creative since we started our house building project.  This is what I ended up taking home with me:

The demonstrator Ken Oliver, is a great guy. He told me my book was beautiful, when I know he’s just being nice. I had trouble using the supplied distresser ink.  I still don’t know what distresser ink does.  And certainly you can’t tell I used it on my book I made!  I’m a origami enthusiast and novice Graphic Designer, not a hard core paper crafter or stamper like Ken and my sister-in-law.  Still, I enjoyed myself, he made it fun!

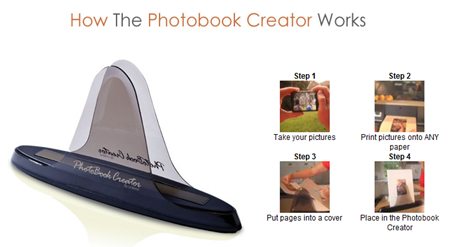
The Photobook Creator is a neat product.  You can bind your own books.  You buy the special book covers that has a resin embedded in it’s spine.  You print photos on any paper, organize them and then heat the spine and the resin binds the paper into your customized book.

The photo books covers themselves aren’t un-reasonable priced either, they range from $5.00 to $20.00 for covers ranging from 4 x 6 inch size to 12 x 12 inches sizes. 

imageimage

** Note: I received no compensation for this review.  The opinions expressed are 100% my own.